The Post to Accounts Receivable page is where you set a posting date, view an Insurance Billing report, and post your pensions to Accounts Receivable.
This Section Includes:
The Report Preferences allow you to select to post invoices now, set a posting date, and filter your employees for the Insurance Billing report and posting.
•Post Billings Now: Select "No" to print an edit list to check the billing amounts before posting. Select "Yes" to have the Post to Accounts Receivable button appear, which allows you to post the billing amounts.
•Posting Date: Enter the date for the posting.
•Frequency: Select one of the 4 hard-coded options. This filters the employees that have been assigned one of these frequencies.
(1).png)
•Employers: The Employers drop-down list is enabled when "No" is selected on the Post Billings Now option.
(1).png)
Select the ![]() button to run the report using the selected preferences.
button to run the report using the selected preferences.
Select the Cancel link to navigate to the Insurance Billing dashboard page.
After the report preview displays, you can navigate the report pages, export the report, print the report, or most importantly Post to Accounts Receivable. Before posting your Insurance Billings, review the report. The Post to Accounts Receivable process creates invoices in Accounts Receivable for further processing.
Click the ![]() bar to change your filter settings, and then click the Run Report button to rerun the report with the new preferences.
bar to change your filter settings, and then click the Run Report button to rerun the report with the new preferences.
Navigation Options:
The navigation options allow you to navigate through your document.
•Click the First Page ![]() icon to navigate to the first page of the report preview.
icon to navigate to the first page of the report preview.
•Click the Previous Page ![]() icon to navigate back one page on the report preview.
icon to navigate back one page on the report preview.
•Click the Next Page ![]() icon to navigate forward one page on the report preview.
icon to navigate forward one page on the report preview.
•Click the Last Page ![]() icon to navigate to the last page of the report preview.
icon to navigate to the last page of the report preview.
•The Current Page field displays your current page number and also the total number of pages in that section or report. An example image is displayed below.
![]()
Export and Print Options:
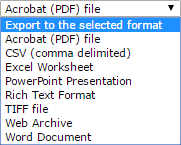
Select a format from the drop-down list and then click the Export link. The file automatically downloads in the format you selected. The following formats are available on the drop-down list.
Click the Print ![]() icon to print the report.
icon to print the report.
Click the ![]() button to leave the report and return to the Insurance Billing dashboard.
button to leave the report and return to the Insurance Billing dashboard.
Click the ![]() button to process the Insurance Billings for all employers.
button to process the Insurance Billings for all employers.